I'm just starting my second to last semester at college this week and as I was setting everything up I realized sharing my color coding strategy could be helpful for many, so here it's a step by step guide on how to keep the color coding from digital to analog and help you get through this semester's courses swiftly and colorfully, believe me this work, I've been the "marker girl" all my life!
So, I color code first from my schedule, and the colors that I choose there are the same I use on my laptop folders for each assignment, planner, post its, and finally on note taking. Having this system really helps me navigate better and make a connection between the class and everything related to it, so here it goes.
SCHEDULE
For my schedule, I use Pages the app, which is the equivalent of Word but for me, it's easier to design there because is much more tables, images and movement friendly, I simply set a table with the necessary amount of cells and use the merge tool to get everything looking nice and centered, then I pick out the color palette, I usually choose bright different ones instead of pastels, since this makes each one stand out and it's easier to remember.
In case you work, just as I do, you could also map your working hours so it all wraps together nicely when you look at it in search of free hours!
After you're done, your schedule should look something like mine, and, BONUS, you could export it as .png or .jpeg and set is as a wallpaper on one of your desktops or on your phone to learn it quickly and have it around, the first couple of weeks this works like a charm, you'll have it memorized soon enough.

LAPTOP FOLDERS
So, if you carry a laptop for college, then having organized folders DEFINITELY makes your life so much easier! Whenever I start a new document I always save it and name it right away on the correct folder so it never gets lost, I know many of you might now use Google Docs or any online Drive to save documents, but precisely because I love using Pages and Keynote so much instead of any other program, I store them this way and when in need upload them to iCloud directly from each, but I don't tend to have everything up in the cloud, for me there's nothing like a hard-drive.
So, back to folders, mine look something like this COLLEGE >, 1º, 2º, 3º, ...and then each folder has it's subjects on the exact color they appear on my schedule. I bet there is about a hundred different ways to do this, and I'll teach you one for Mac computers that works perfectly without needing design programs, all you'll need is:
- a screenshot of each color
- Image2Icon the free version of the app is enough, you can get it here.
step 1 - create all of your folders and name them.
step 2 - take a big squared screenshot of every color you're gonna use.
(pick each color on pages and make a big square, then screenshot it using cmd+shift+4)
step 3 - launch Image2Icon, and drag and drop the color screenshot to the app, you'll see a bunch of options appear on the side bar. Now, comes the "tricky part" you can either choose one of the free ones, buy the locked items for $9.99 total, (if you do so, skip to step 6) OR, do my pretty-much-illegal-yet-handy loophole and follow step 4.
step 4 - pick the complete folder that has a lock, and screenshot (close to the edges) the large folder icon that pops up on the screen, and go back deleting all progress.
step 5 - drag and drop the screenshot you took of the folder and select "remove background" drag the controller until the folder is still visible but you've deleted all the checkered squares around it.
step 6 - export the folder, as a folder, to your desktop. This is the best option for saving it and using it again later on without repeating this whole process. It'll take a second to look like you've designed it, hold on, it's happening.
step 7 - having both folders visible, the one for your subject, and the colored one, click on each of them at a time and open the information tab, you can do it with left a click, or simply by pressing cmd+i on your laptop, this opens up two stripes with information about each folder.
step 8 - once you have the two information strips out, click on the colored folder and it'll appear "selected" copy it, and simply click on the other plain folder, and paste it, and voilá!


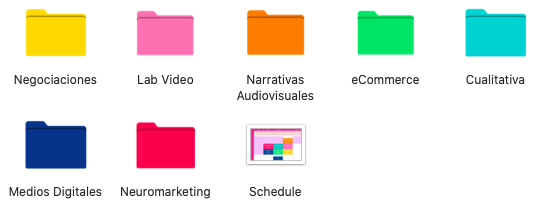
If you know your way around design programs like photoshop or illustrator, you can create some really nice folders there simply by saving your designs as a .png and then saving them as an "original" on the app. I really like to play around with my folders and create more original designs, just as the ones on the picture above, or even collections, one of this days I might upload one here for you guys, for the moment, let's go straight up to the next thing...
PLANNER
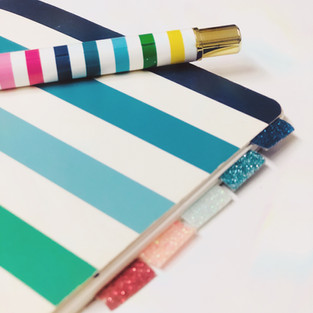
For your planner, agenda or homework notebook, the process is quite easy and logical. Simply keep a marker of each color on your pencil case, (I recommend Crayola Super Tips or Zebra Mildliners) and use it to mark every task you've got from each subject, and then, cross it over with that same color when completed. I don't know why, but crossing things from lists is so satisfying and doing it with nice colors more!
If you're planner has an hourly layout just like mine does, then, I recommend highlighting the time frame the class takes upon each day, and simply writing any important things that happened during class, or due assignments next to it, just like I do.
BONUS!, use Post-It's of each color to write down tasks that take more than one day, this way, you'll keep moving them around to each day instead of writing them over and over and over again.

NOTE TAKING
So for note taking, I'll cover all three possible options you might use, laptop, tablet or, classic, old school, paper.
1. Laptop
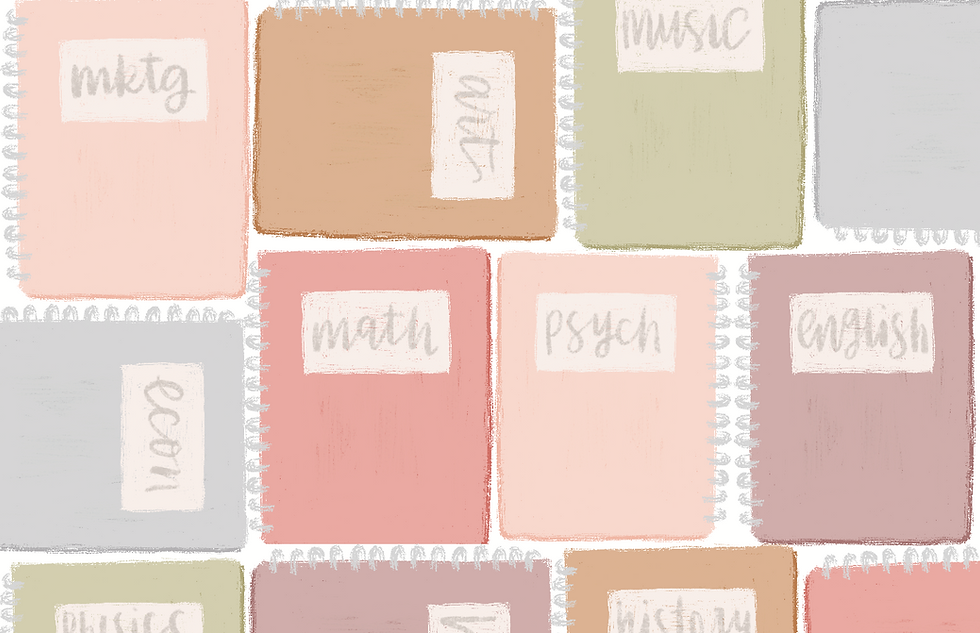
For those of you who take notes on your laptop, I recommend having one single document for each subject, and simply adding the date and title on the beginning of a new page using it's color, I created color blocked headers just like this ones so I'd find everything quickly.
When I used this method I used to like making them look like notebooks, so I'd use the first page as a cover by having it completely in the color it's assigned and simply adding subject, room, and teacher's name and e-mail (tends to come in handy, write it down from the syllabus).
Also, I know there are many other alternatives I simply don't know about, but you could try and check out Evernote, or any other note taking app that might work and just set the colors right!
2. Tablet
Ever since I bought my iPad Pro, it's been a game changer. I used to carry a hundred of markers LITERALLY to school every day, and now I get to carry hundreds that come in one magic Apple Pencil. When I first got the iPad, even though I did not plan for it to become also a tool for school, it did immediately, first I tried out Notability and even though it's a great app, something about the way you write, and mainly, the way highlighting does not come behind the text bugged me, so I gave Good Notes a try and fell completely in love with it!
I'll be writing a post talking only about Good Notes, who knows, maybe even recording a video, on every single thing that makes it the greatest note taking app for me, but for the time given I'll get right into color coding since that is what this is all about.
So, for note taking here I create my own notebook covers (obviously with the matching color, as if you don't know this at this point) by either simply drawing all over one of the covers they already have, or by making a nicer one on procreate. And, then try and use the color just as much as you possibly can within it to make it stick, titles, underlining, diagrams, everything; but get creative, not just use one shade of pink, use as many as you'd like as long as well, they're pink! or orange, purple, blue whatever.

3. Paper
Old schooled paper, I still love it don't get me wrong. But I've just kinda quit on it for college purposes because, a) I wasted a ton of paper and well, the trees; and b) I thought about the amount of paper and notebooks and binders I would need to carry with me when I graduate and someday leave my parents' house, and if looking at documents and notes from an USB sounds unlikely in the future, going through mountains of paper stored on a basement sounds impossible, so that's why around my second year of college I decided to go *almost* fully green and paperless.
Yet, exactly a year back, I enrolled on an entrepreneurship program and it was all connected, so I decided to give a little Leuchtturum 1917 Vineyard Vines notebook that I love a use, and it became my Girl Boss Guidebook practically, so I had to figure out how to fit seven different subjects on one notebook without wasting space and keeping it cohesive, and there is where one of my best friends comes along, washi tape! Each class had it's own color of washi tape and marker, and so I wrote and took notes of everything I needed for the day, and then marked the upper corner with washi tape and continued to do the same for the next class and so on, this way, whenever I need to look something specific up, I just search for the color tabs I know have the information and navigate through the notes quicker.


I really hope this tips help you get through the semester in a brigther, smarter, more organized way that makes you excited about keeping up with everything, and also, makes everything easier. If you try any of the methods or have some other useful ones, please feel free to share and comment here so that we all get to learn about what works best for everyone, and also, if there's anything I might've left out, feel free to ask away and I'll either answer how I'm solving that exact thing, or come up with something creative that might just work!
love,
Pal.
Comentarios